Description:
This article provides agents with the initial setup steps in Splashtop for onboarding a new customer. The process includes creating a group, generating a deployment code, and sending user invitations.
Troubleshooting Steps:
Step 1 – Create a Group
Log in to the Splashtop console.
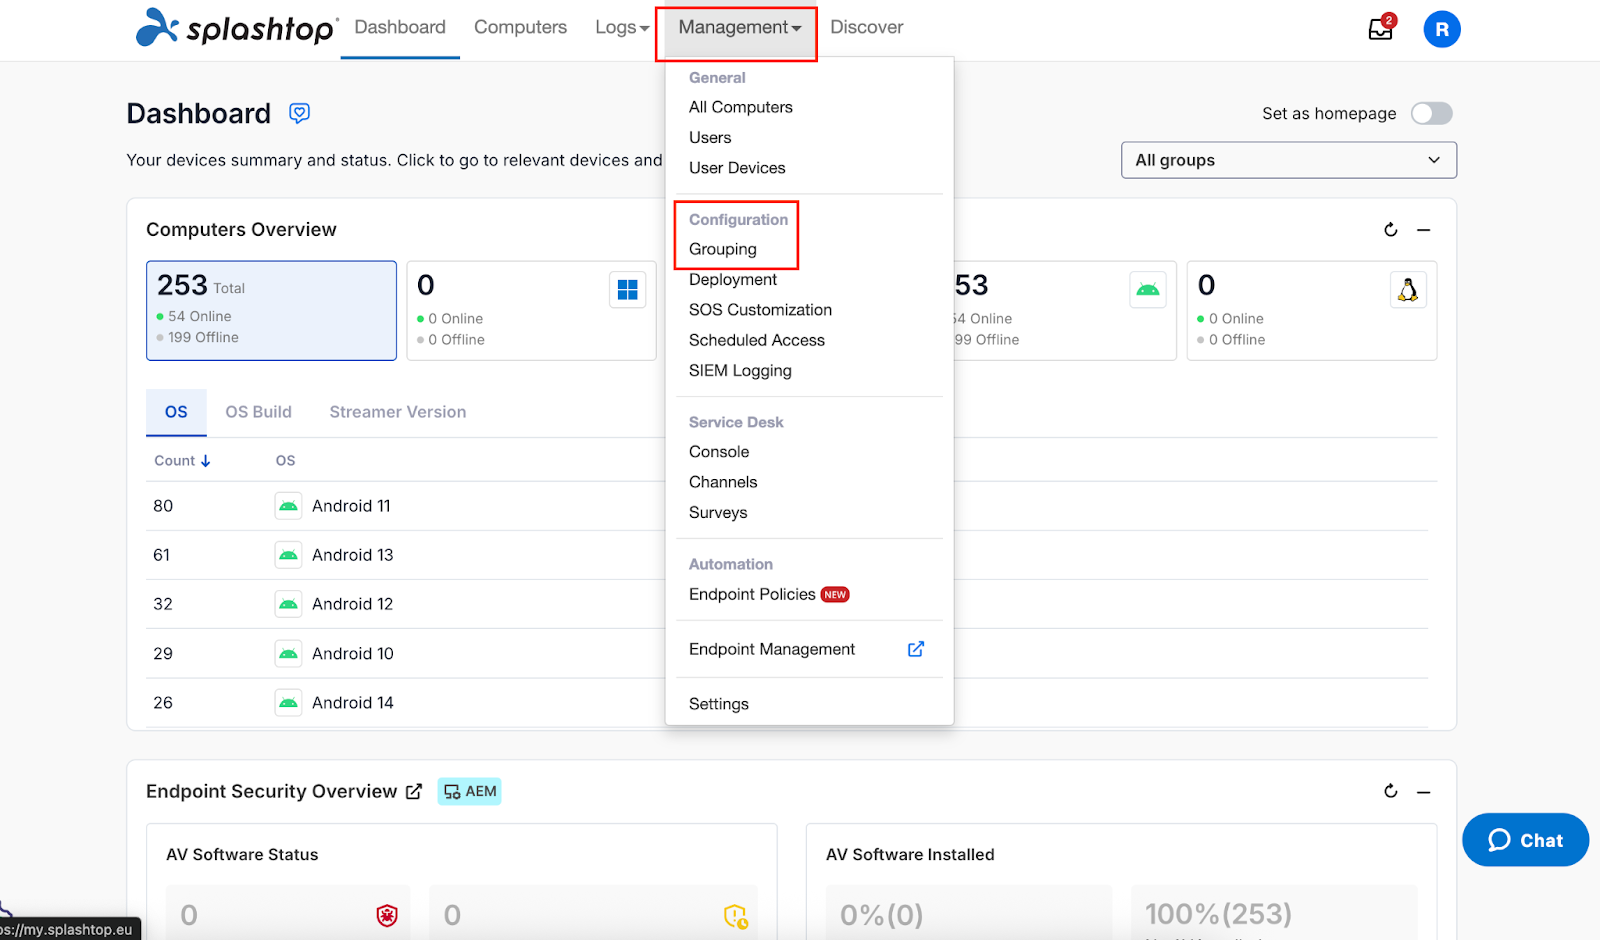
Navigate to Management > Grouping.
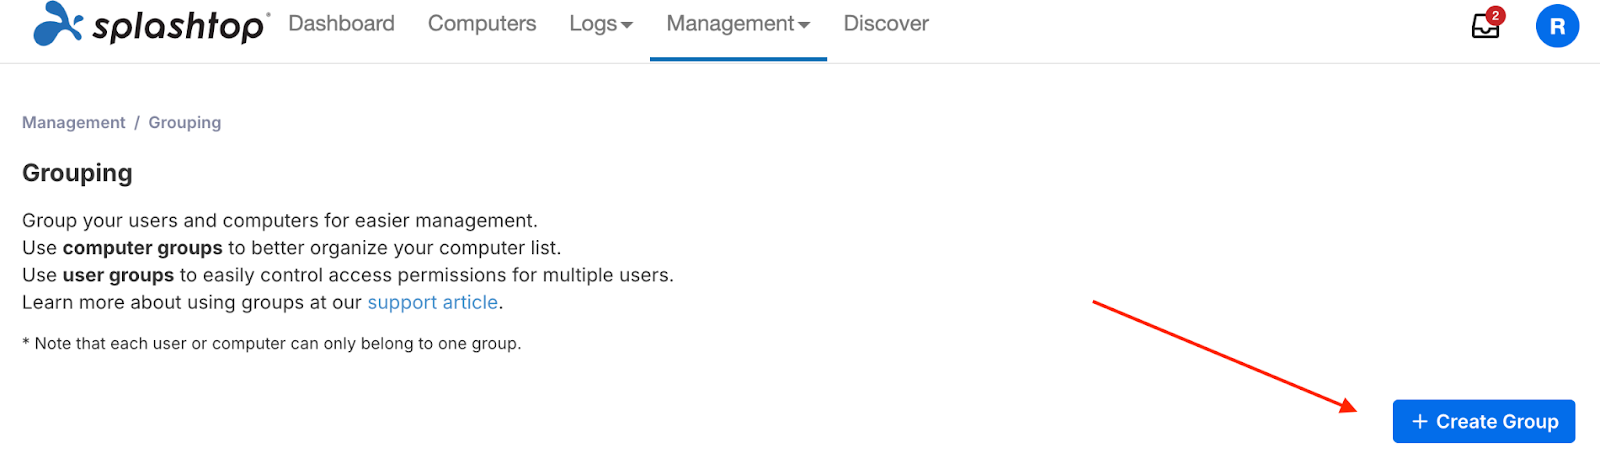
Click +Create Group (upper right).
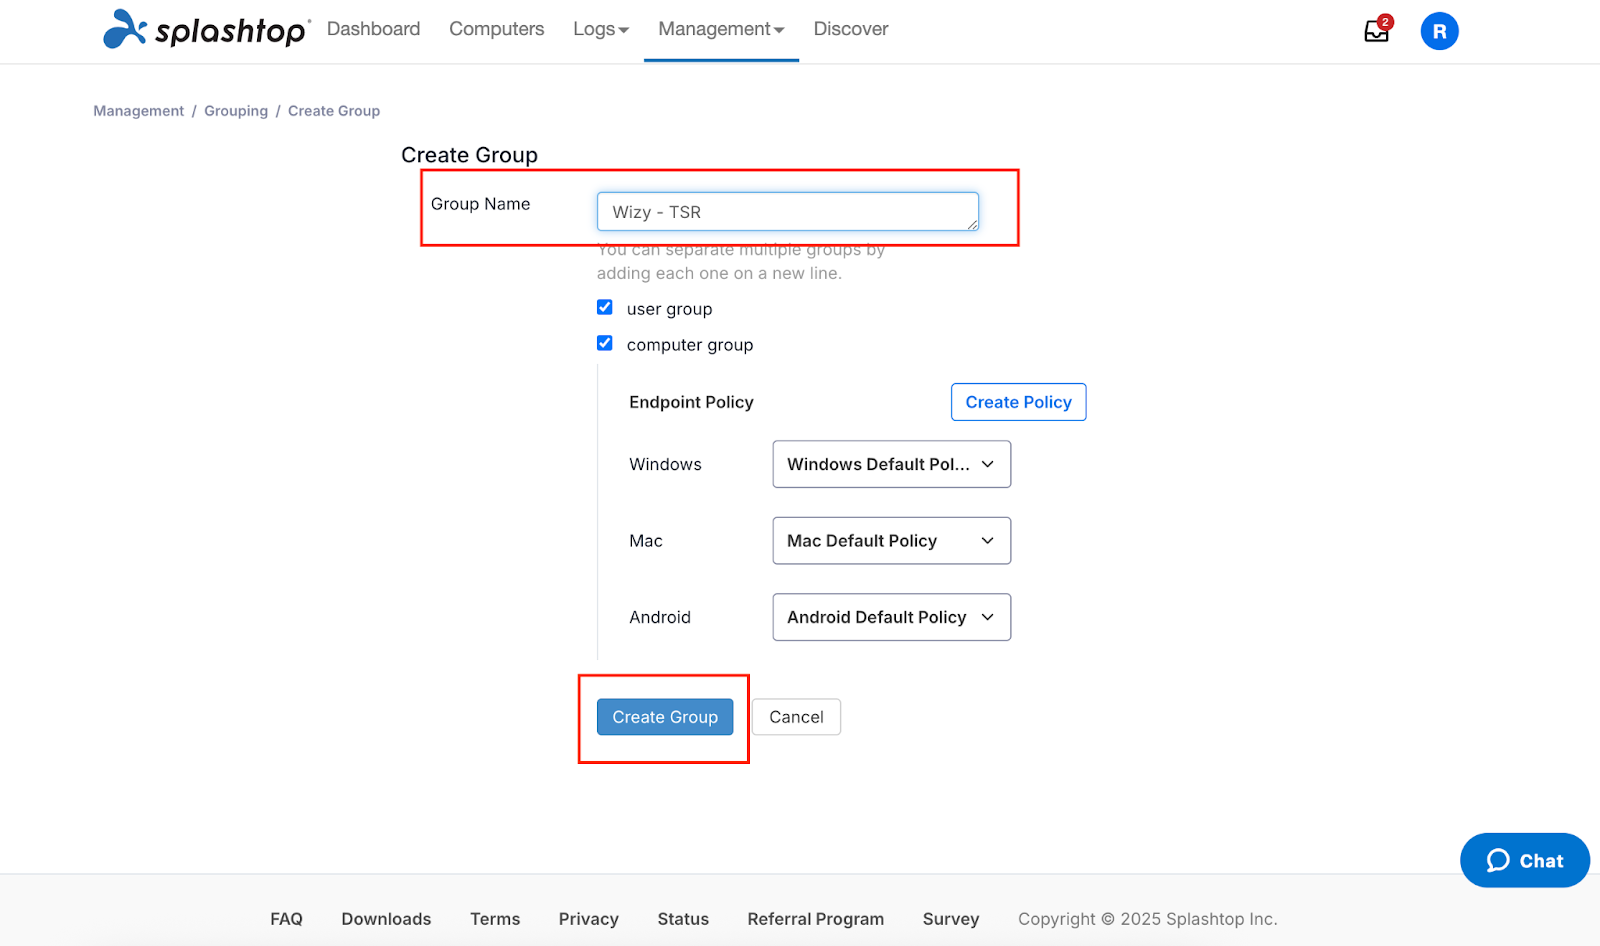
Enter the group name in the format: Partner - Customer.
Example: Jamf - ABC Corp
Click Create Group.
Step 2 – Generate Deployment Code
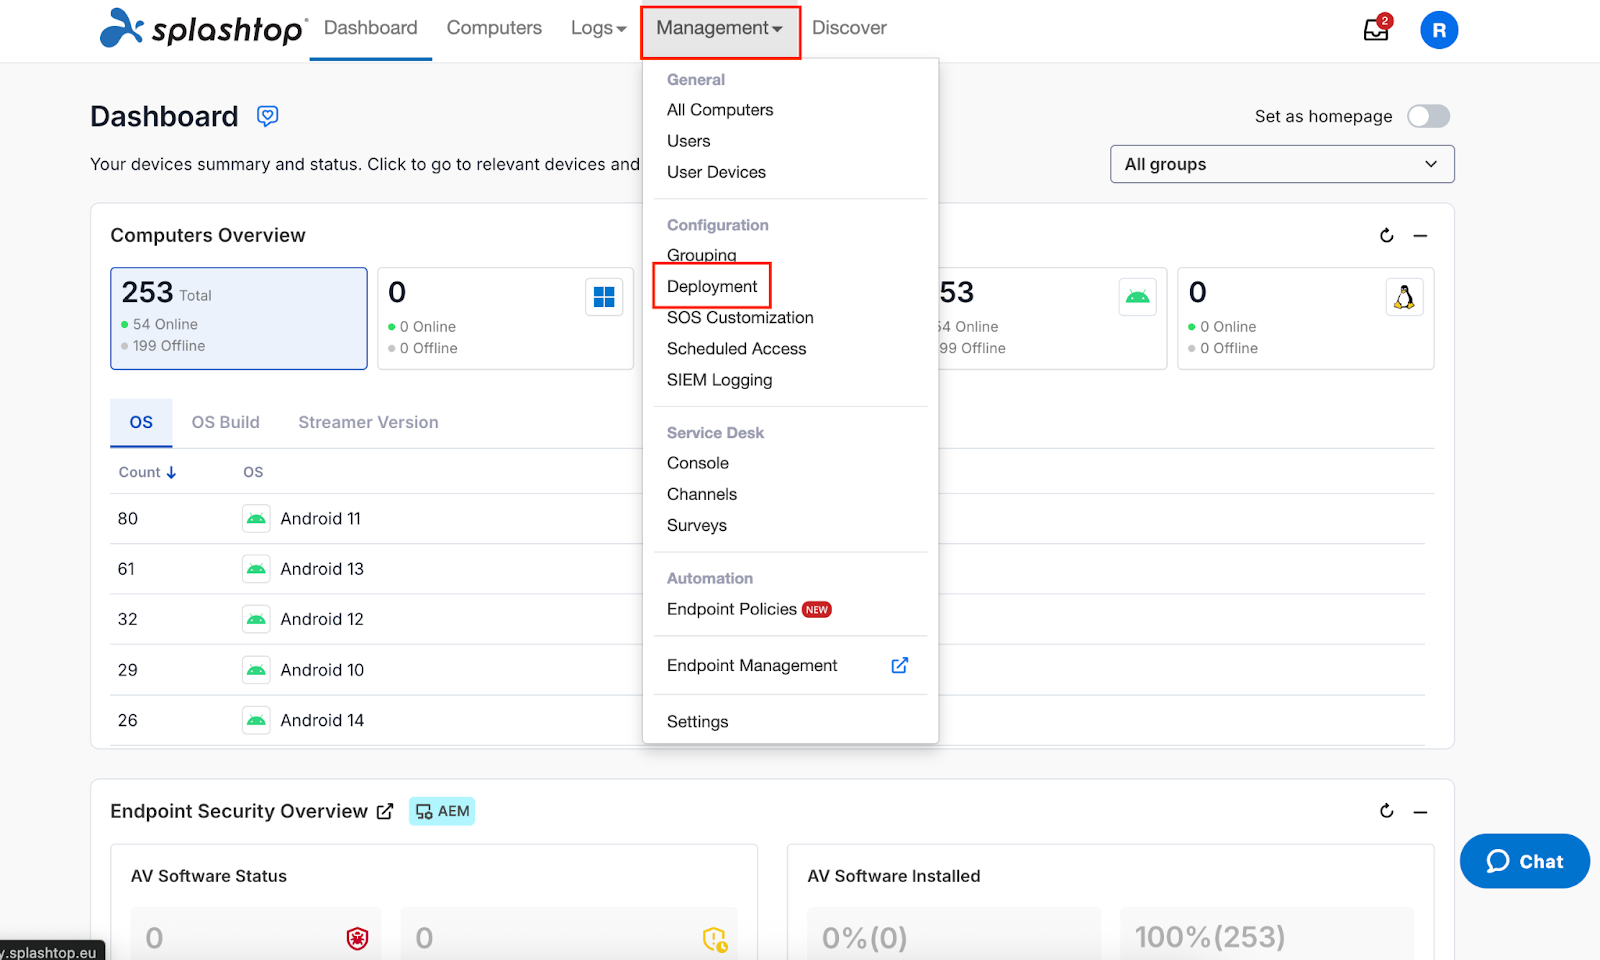
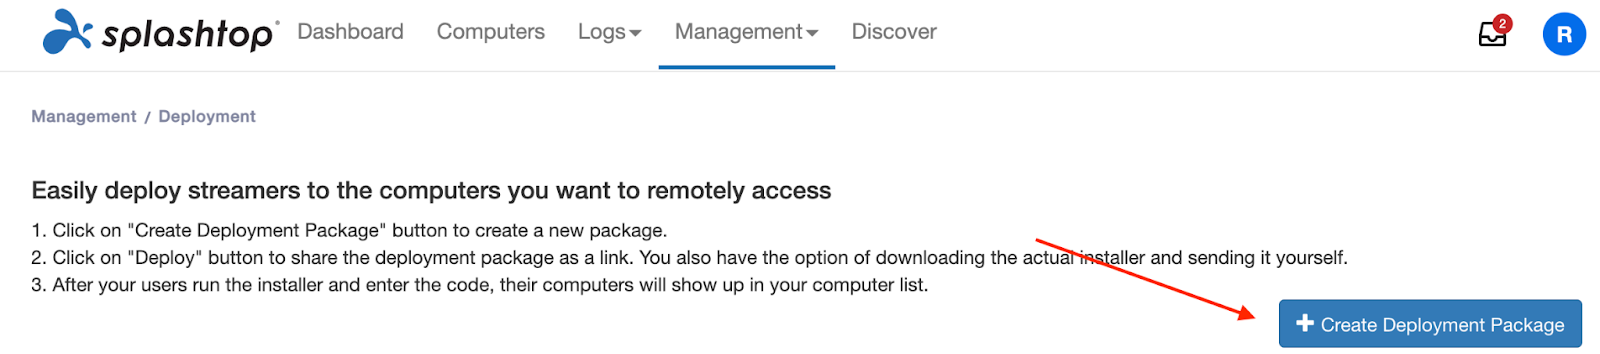
In the Splashtop console, go to Management > Deployment.
Click +Create Deployment Package.
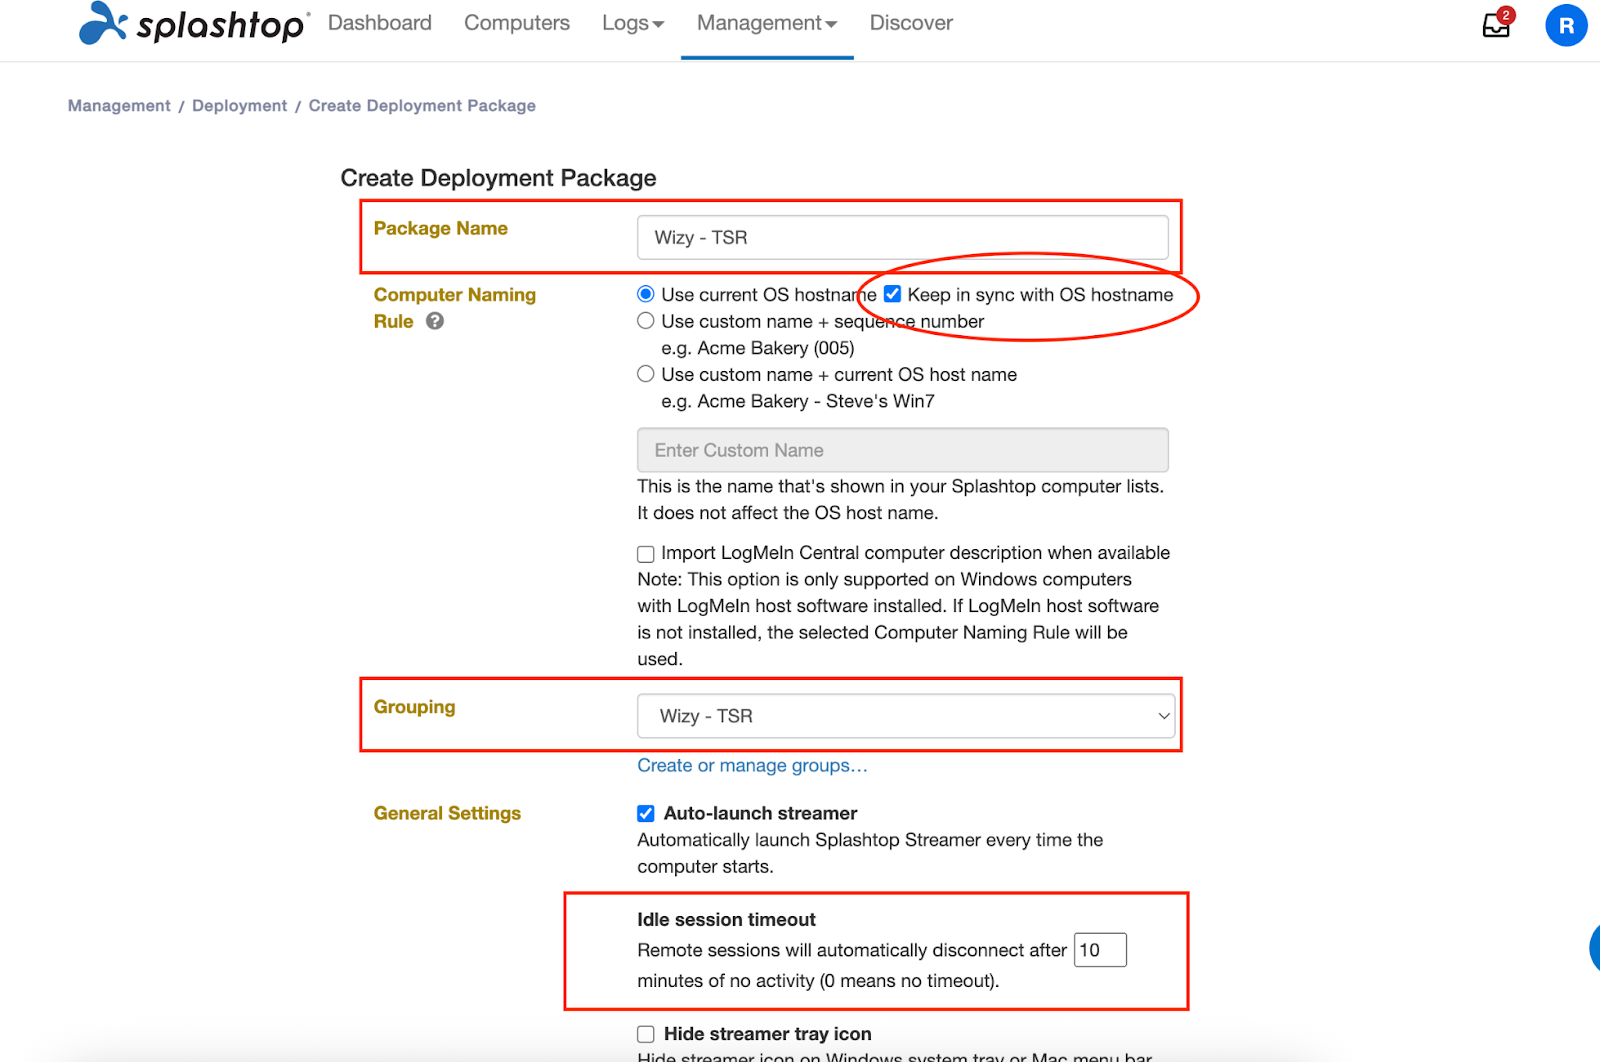
Fill in the package details:
Name: Use the same format (Partner - Customer).
Assign to Group: Select the group created in Step 1.
Under Additional Settings, ensure the following are configured:
Keep in sync with OS hostname (enabled).
Remote sessions will automatically disconnect after → set to 10 minutes.
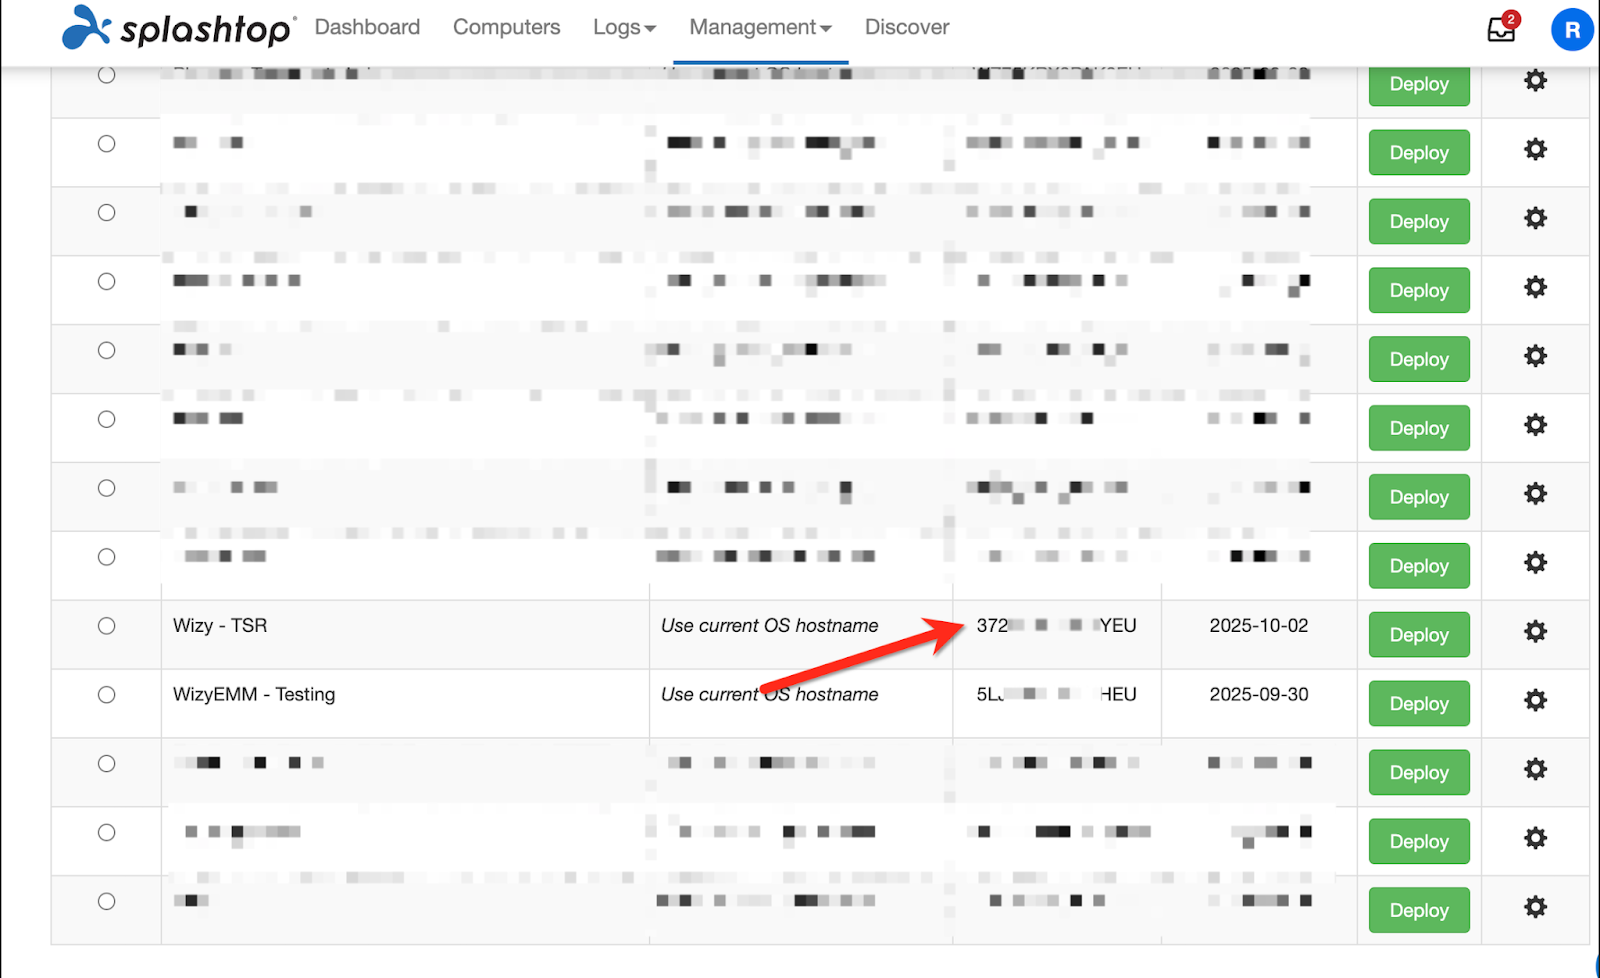
Save and copy the generated deployment code.
Provide this code for installing the Splashtop Streamer on customer devices, or configure it directly if handling setup yourself.
Step 3 – Send User Invite
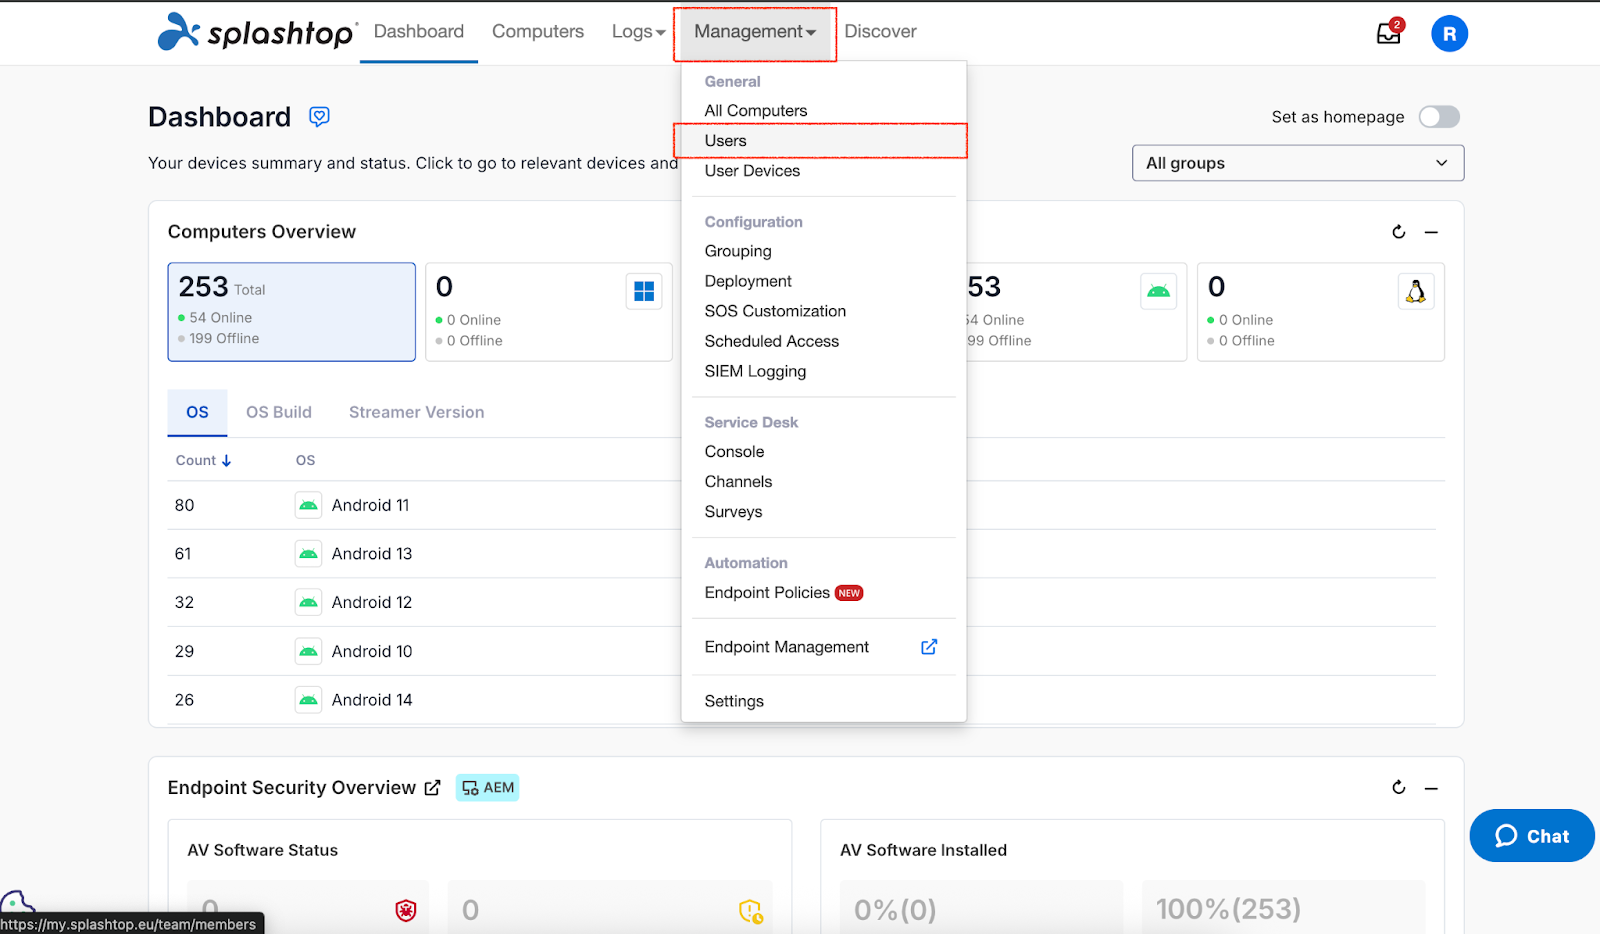
Go to Management > Users.
Before adding a new user, check the number of available seats/licenses at the top right of the user list.
If seats are full, request additional licenses before proceeding.
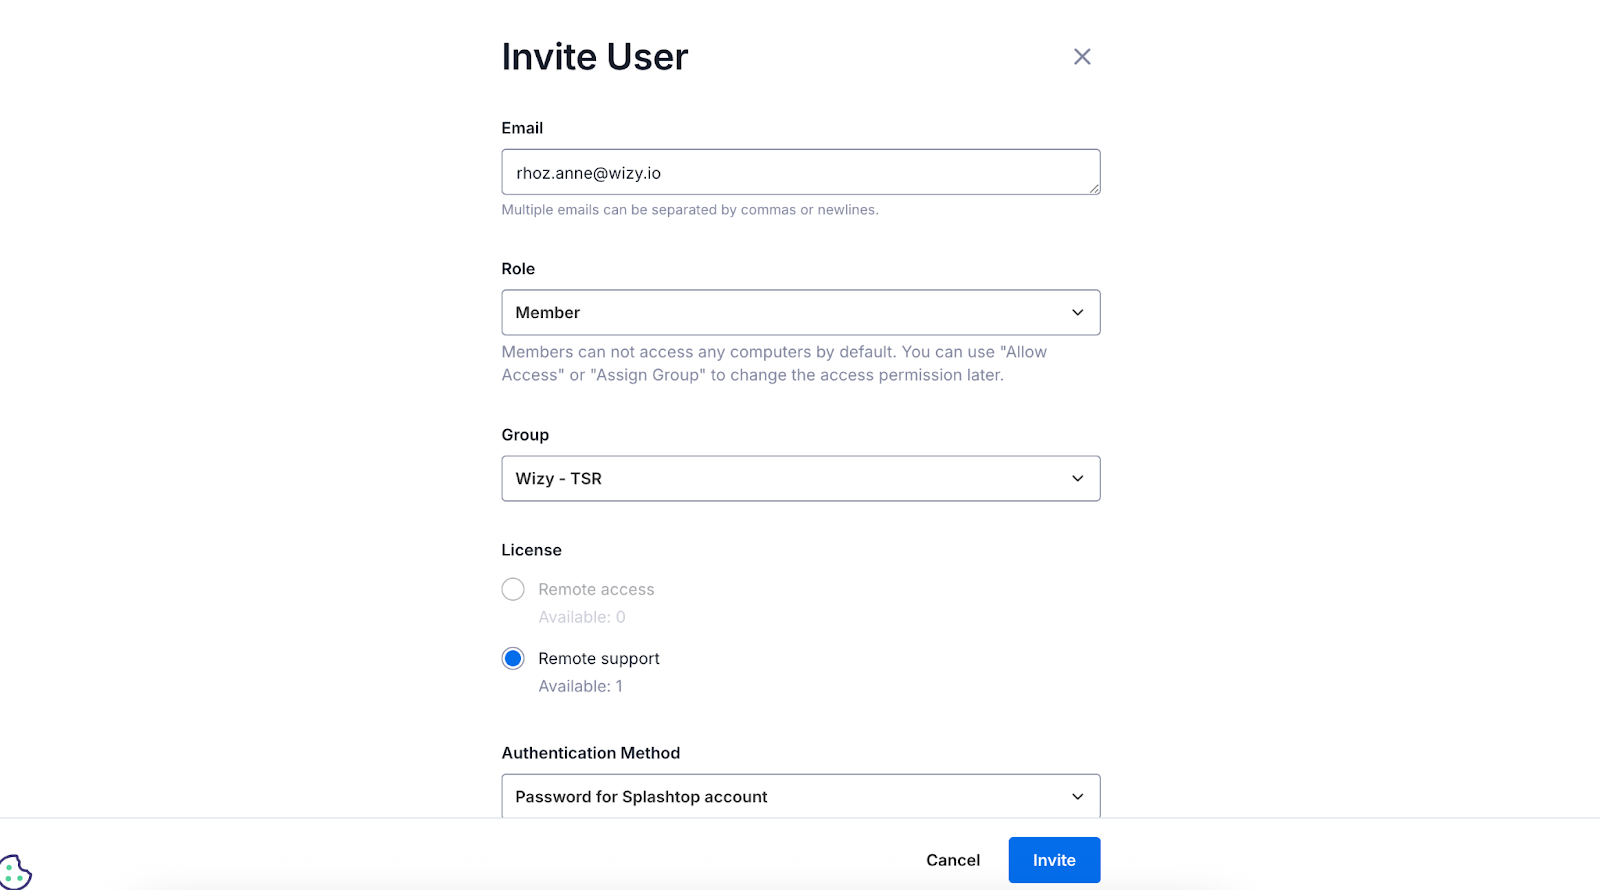
Click +Add User or the person icon.
Select Invite Via Email.
Fill out the details.
Click Invite. The user will receive an email to set up their Splashtop account.

Was this article helpful?
That’s Great!
Thank you for your feedback
Sorry! We couldn't be helpful
Thank you for your feedback
Feedback sent
We appreciate your effort and will try to fix the article